OVERVIEW
The term “progress billing” has different connotations depending on the firm using it. In WorkSpace, a Progress Bill is a way of organizing and managing multiple invoices that relate to single project or deliverable. Progress Bills are not invoices in and of themselves because they do not count towards A/R. The best way to think of them is as a specialized billing statement for large engagements that will be billed incrementally until completion.
USER GUIDE
Let’s say we’re engaged with ABC Company to do an audit. The job will take approximately three months and cost a total of $9,000. ABC Company has agreed to pay in $3,000 monthly installments.
To create a Progress Bill to manage this engagement, navigate to the Billing Tab > Invoices view and click the Progress Bill button in the tool bar, then select Add Progress Bill from the context menu.
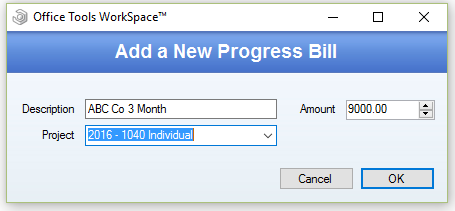
In the Add a New Progress Bill window, enter the description of the engagement (“ABC Co 3 Month Audit”), the total amount of the engagement ($9,000), and you can associate an active Project if one exists for this engagement. Then, click OK.
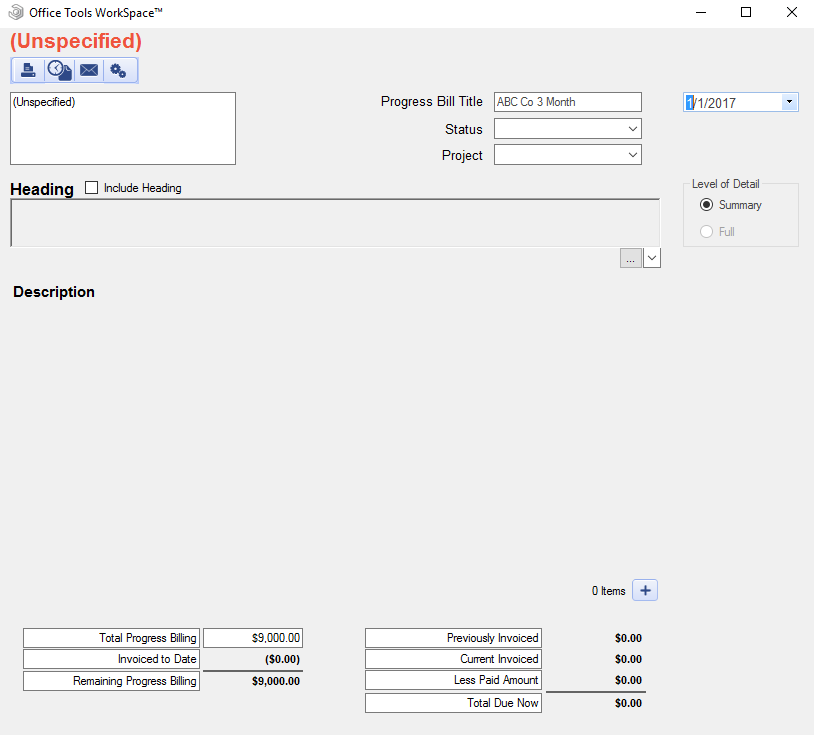
Your new Progress Bill will open and should be empty except for the “$9,000” showing in the Total Progress Billing and Remaining Progress Billing in the bottom left-hand corner. At this point, you’re done until it’s time to invoice the client for the first installment. Once your first $3,000 invoice has been created, (see Creating an Invoice [needs hyper link]) you can add the invoice to your progress bill in one of two ways.
The first is to right click on a highlighted invoice in the Billing Tab>Invoice view and select Add to Progress Bill>Existing Progress Bill from the context menu. After selecting the appropriate Progress Bill to add the invoice to, your update Progress Bill will open, showing the invoice as a line item.
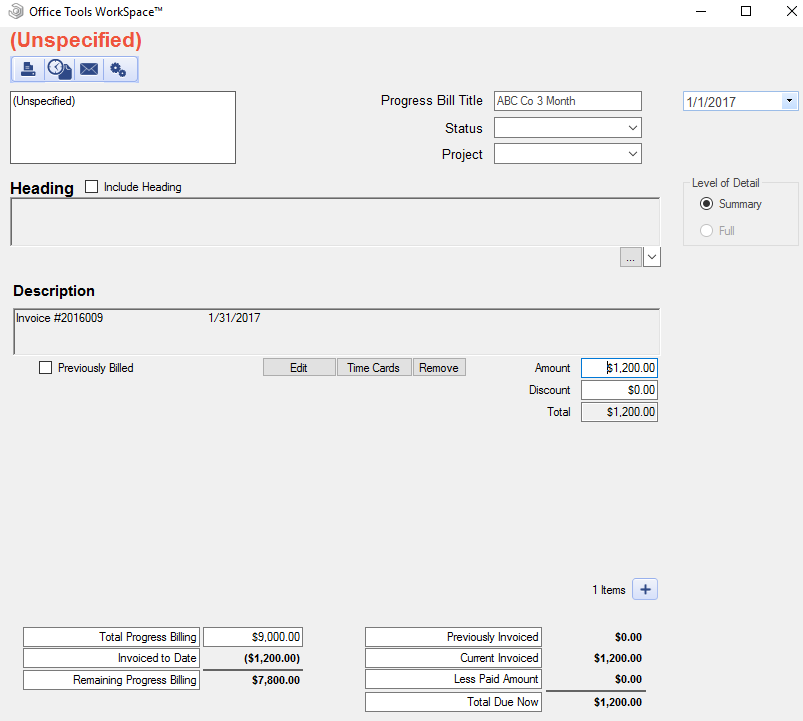
The second way you can add an invoice to is to open the Progress Bill itself and click the + button in the bottom right-hand corner of the Progress Bill window and select from the list of available invoices.
Once you’ve added an invoice, the totals at the bottom of the Progress Bill will update to show the client how much they’re being billed for this installment as well as the amount remaining on the engagement. WorkSpace users often provide their clients a detailed invoice for the current installment as well as the Progress Bill.
RELATED GUIDES
- Introduction to Billing
- Recurring Billing
- Value Billing
- Project Invoicing
- WIP Billing
- Bill To Contacts
- How to Track Time
- How to Assign WIP to an Existing Invoice
- Tracking a Client Payment