OVERVIEW
Time tracking, for a lot of firms, is an essential part of their daily routine. It helps to pay the hourly staff, it helps to gauge what a client bill should be, helps to budget workload. It reaches its hand in to every aspect of an office. Even though there are some in the industry who want to do away with the time component, most still implement it some form.
USER GUIDE
Within OfficeTools WorkSpace there are basically three methods of time tracking: Tracking a time card, managing a timer, or plugging time in manually onto a time sheet.
TIME CARD
Tracking time via a time card is WorkSpace’s idea of best practice. When a task is completed via the Activity List a time card should automatically pop up with the details on that task. Plug in the Work Code, time spent, Project, Notes and that will be sent right to the time sheet on the time tab. It is quick and easy and happens automatically.

If applicable you can also track expenses right from this screen using the Expenses tab. Time cards come up automatically when a task completed, but can be generated without completion by right clicking on the desired task on the Activity List and choosing Create Time Card. The same window will pop up.
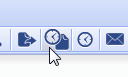
Lastly, in the toolbar of some tabs you will see a button that has what looks like a clock and a paper that will generate the same Create Time Card window as completing a task will.
TIMER
The Timer function can be the most accurate method of time tracking if used properly, or it can be the most inaccurate. Timers work in a start and stop function.
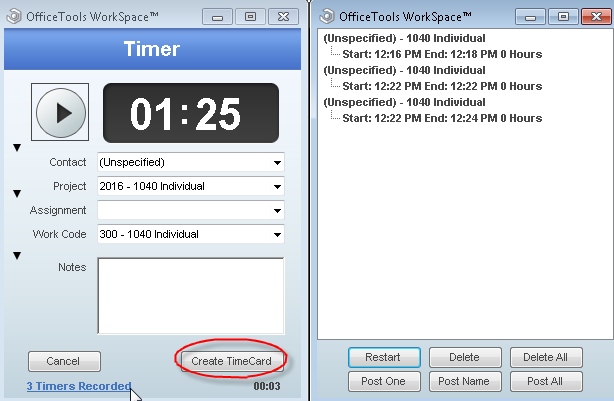
To start a timer, click on the image of the clock in the toolbar and a Timer window will come up. Choose your Contact, Work Code and Notes if applicable, and press the play button. This will begin a running clock that will keep track of time for you.

Please note that the timer window can end up behind other programs that may be in use and it is possible that it could be forgotten.
If you plan on using timers it is recommended to have a spot on your screen that does not get covered by other programs specifically to put the timer window. To stop your timer, click the pause button. Although the graphic indicates that you have paused your timer, please be aware if you click the play button again, it will begin a new timer. This is for ease of switching between client’s work, getting interrupted by phone calls, or even staff. You will notice at the bottom of the timer window that the timer has been recorded and has not been lost. You can collect timers throughout the day and when desired you can click on Create Time Card to take your timers and send them to the time sheet. At that point in time, WorkSpace will ask you if you would like to combine timers with the same client, work code, and project. So if you were interrupted, at the end of the day you can combine the time cards that are all for the same thing so it only shows as one time entry on the time sheet instead of 5 minutes here, 35 minutes there.
TIME SHEET
A lot of firms elect to track time in a more old fashioned way via the time sheet. If you navigate to the Time tab at the top of the screen you will have accessed the daily time sheet for the staff displayed in the middle of the screen. A calendar will be displayed on the left hand side which allows you to choose the day you would like to view tracked time for. A summary of the day will be displayed under the staff name including things like total time tracked, billable hours generated, billable amounts, etc.
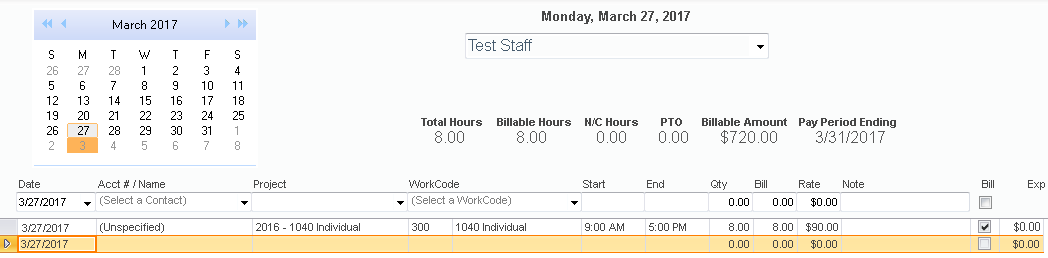
To key time into this screen it is important to remember that WorkSpace is a Tab key based system not Enter key based. To move through fields you are going to need to hit the Tab key. On this screen you will always see an empty line under the fields at the top. This is your editable line. To key time in, select the empty line at the bottom, and click on the Acct # / Name field at the top and key the client information in. Hit the Tab key and key in the rest of the information including Work Code, Start and End times or just a total quantity, and some time card Notes. Continue tabbing all the way through the fields and your time entry will be solidified and tracked.
Again remember this is an accumulation of all time tracked for the specific staff for the specific day.
Expenses and Mileage are also tracked from here as well. In the toolbar you will see a button for each that pulls open the ability for non-time based billable amounts to be tracked. Please note all expenses and mileage needs to be associated to a time entry tied to the appropriate client, even if the time entry is for zero hours.
On the small calendar on the left, the days that have time tracked on them will be highlighted in yellow. So at a glance you can see exactly which days you have tracked time for.
RELATED GUIDES
- Introduction to Time
- How to Associate Rates to Work Codes
- Billing Tiers & Multipliers
- What is a Work Code?
- How to Create a Work Code?
- Staff Time Sheet Reports
FREQUENTLY ASKED QUESTIONS
- Why is my time not billable? Why is my time not showing in the Billable Time screen?
- Is it necessary to track my time if I strictly do value based billing?
- Can I view all unbilled time entries for all of my firm’s clients?
- Do I have to release time from my time sheet to WIP? Is there a process for making my time available for invoicing?
- Can I print my time sheet directly from WorkSpace?
- Can I view other staff member’s time sheets?
- Do I have to use start and end times when I am keying my time in?
- Some staff have a project column on their time sheet, but I don’t. How do I turn it on?