OVERVIEW
Adding a contact in OfficeTools WorkSpace is the first step to tracking contact activity, notes, reporting and other pertinent information related to that contact. The contact selected will determine the detail displayed on all 9 of the corresponding tabs so it is important that the contact information provided when adding a contact is accurate although it can be altered later if necessary.
USER GUIDE
To create a new contact, navigate to the “Contacts” tab first. Please keep in mind it does not matter which contact you have selected at the time.
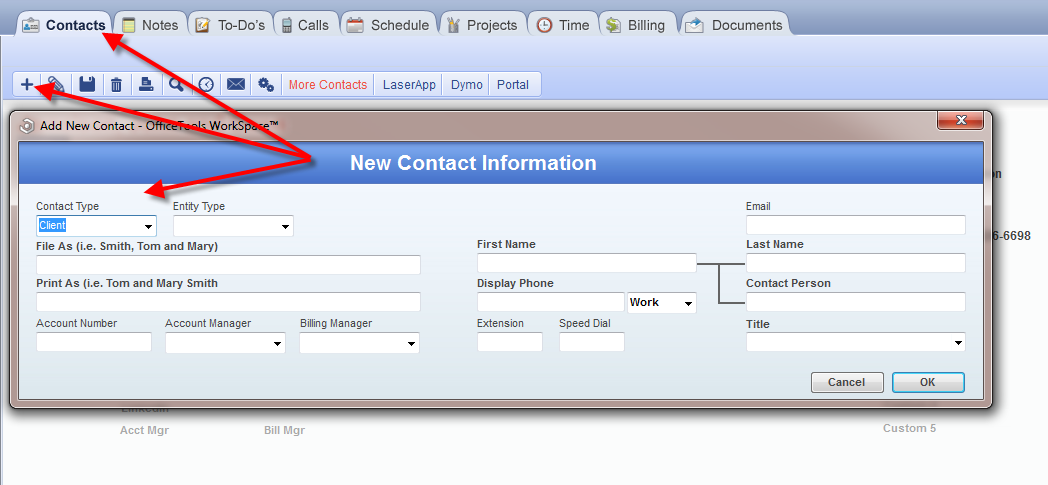
- Click the “+” icon at the toolbar on the top of the window directly underneath the “Contacts” tab
- Fill in all known contact information in the “New Contact Information” window that is prompted
- Click “OK”
- The contact window will now be in “edit” mode by default after clicking “OK” in the “New Contact Information” window
- Fill in the rest of the known contact information for the contact that was just created
- Click the “save” icon on the above toolbar
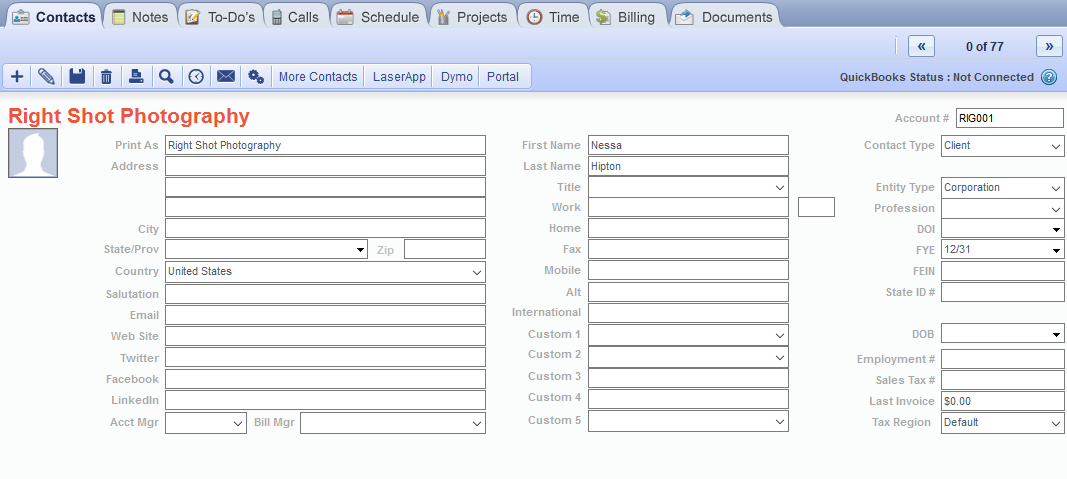
Remember when creating a contact that some fields will change depending on the selection made from different fields. For example, if the entity type selected is “individual” the information prompted for that individual will be different from the information prompted for a “Corporation” or “S-Corp”. If there are additional contacts relative to the contact just created, add them to this contact by clicking the “More Contacts” button on the above toolbar. When adding multiple contacts, do so by utilizing the Excel Import tool provided by OfficeTools Support free of charge upon purchase of the OfficeTools WorkSpace.
RELATED GUIDES
- Introduction to Contacts
- How to Unhide a Contact
- Utilizing the More Contacts Button
- Creating Relationships
FREQUENTLY ASKED QUESTIONS
- Can I sync contact information from my current Practice Management software?
- A staff member accidentally hid a contact, how do I unhide them?
- I can’t find a contact I entered, but I know their social security number, can I use that to search for them?
- How do I know if I have created a relationship or added an additional contact for a client?
- How do I say that an individual client owns a corporate client in your system, but still keep them as separate accounts?