OVERVIEW
The More Contacts button found in the Contacts tab allows the storage and access to all points of contact for a specific entity outside of the main contact.
USER GUIDE
Unlike the function of Relationships, which allows you to associate separate contacts together in your Contact List, the More Contacts button is used to store internal contacts for one entity. For example at any given business, you may need to have the contact details for the owner, or multiple partners, the receptionist, an accounts payable staff. You may have many contacts for that exact entity.
It would not be efficient to add each person for that entity into the Contact List individually. You want all points of contact consolidated into one place. To access the Additional Contacts screen click on the More Contacts button in the toolbar of the Contacts tab.
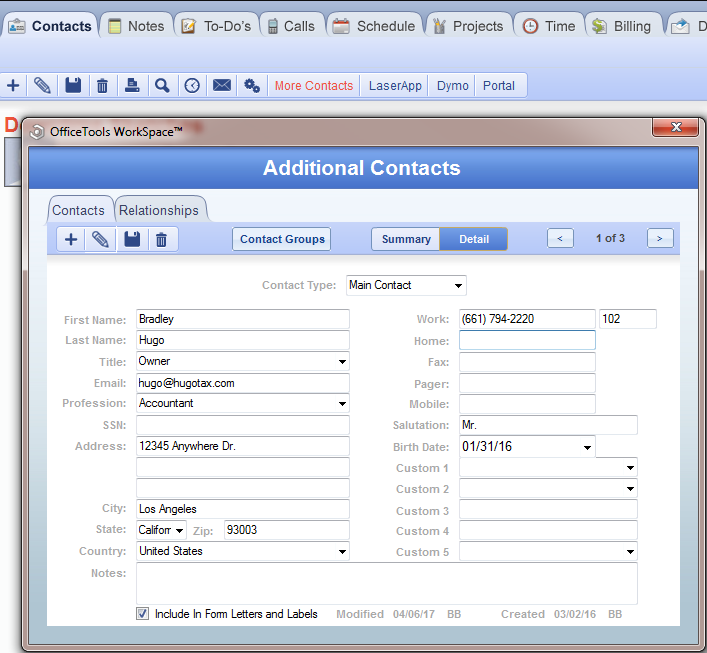
There is a toolbar in the Additional Contacts screen that allows the “add”, “edit”, “save”, and “delete” functions. To add an additional contact click on the plus sign in the toolbar and fill in the appropriate information for the desired contact. In the middle drop down menu at the top of the screen you will want to choose the Contact Type.
There are three options, Main Contact, Alternate Contact, and Dependent and each contact will need to be assigned to one of these types. The Main Contact is going to be the contact that is displayed on the Contacts tab and Contact Card. The difference between Alternate and Dependents is nominal and really just adjust a few fields that are available for each.
You can add as many additional contacts as desired for any given entity and they can all be accessed via the Additional Contacts screen. You will notice once you have created an additional contact that the More Contacts button lights up red in the Contacts tab.
RELATED GUIDES
FREQUENTLY ASKED QUESTIONS
- What is the easiest way to view relationships or more contacts that I have created?
- How do I know if I have created a relationship or added an additional contact for a client?
- How do I say that an individual owns a corporation in your system but still keep them as a separate accounts?
- Where can I put additional email addresses for a client?