OVERVIEW
Within the Projects tab in the toolbar there is a button that says Manage. This button allows access to a firm wide, non-client specific list of every single active project (not completed) that exists in the database. This is a very powerful window that as stated controls all existing projects for the firm, so access should be limited in the user rights section.
USER GUIDE
The Manage button should be used when you need to make mass edits, assignments or reassignments, or changes to a large group of projects at once. This screen can also be used to delete projects in mass as well. You can use the filters button on the bottom left to filter your list down to a desired set of projects, using things like company name, project description, due date, assigned staff, etc. Once you have a list of desired projects, you will need to select the projects you would like to manage using the checkbox column labeled SEL on the right. Then choose the action at the bottom. Change will allow access to make changes to the Project Manager, Lead, Assigned Staff, Wok Code, Due Dates, Completion, and Extension dates. If a staff leaves your firm you may use this function to move their projects to a different staff, or if you want move all 1040’s to their extension date in bulk. The Assign button at the bottom of the Manage Active Projects screen will allow you to assign projects to a specific assignment and to a specific staff. All selected projects will receive the same assignment so be thorough in selecting the desired projects.
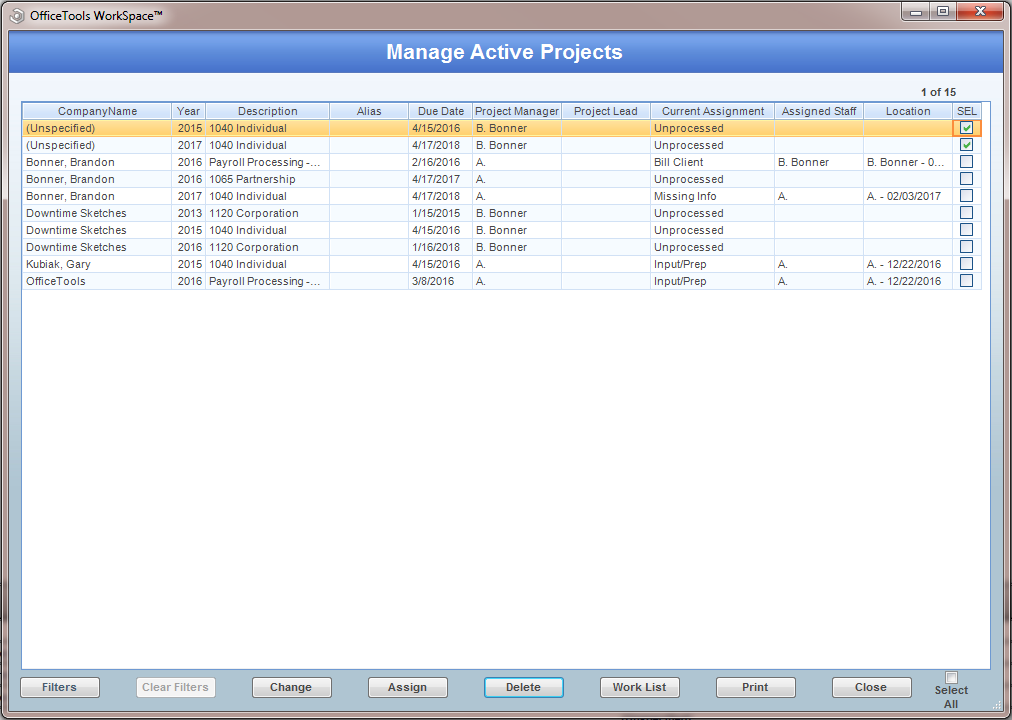
The Delete button can PERMANENTLY delete any selection of active projects that exist in your firm. Please use with caution.
The Worklist and Print options are relatively straightforward, as one allows you to view the audit trail of a selected project and the other will allow you to print to the filtered project list on screen, respectively.