OVERVIEW
OfficeTools esignatures allows you to send documents directly to your clients for electronic signature. This user guide will cover the setup required to utilize everything this feature has to offer.
USER GUIDES
To start using esignatures today, all you have to do is log onto your store account and add a credit card number. You must use the link below to access your payment profiles on the OfficeTools Online Store. Once logged in to your account, navigate to Billing Information -> Enter Credit Card Details
Your card will be automatically charged at the end of each month, for your completed esignatures and you will receive an electronic receipt for your records.
Next, open the Setup menu and navigate to My Company > Information & Settings > esignatures
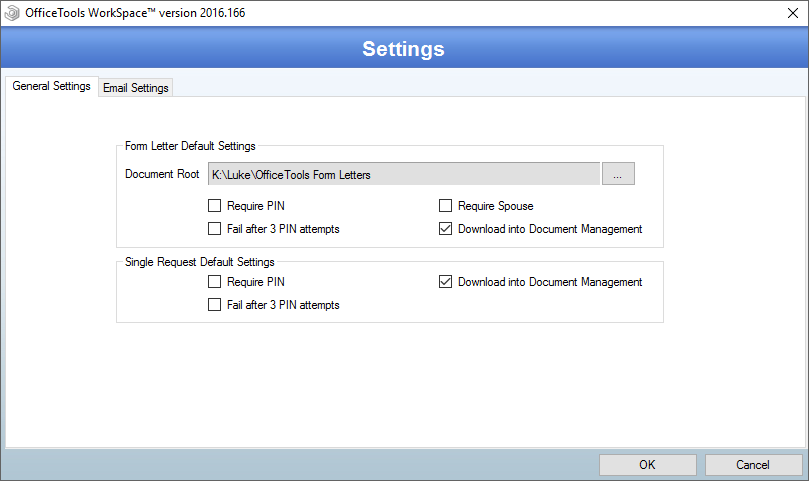
You will need to specify a Document Root where all form letter templates will reside. Any templates created in OfficeTools will be stored here. In order to ensure that all templates are accessible by other staff members, the specified location should be on a network drive.
For standard form letters, set the default options in the Form Letter Default Settings section.
- Enable Require PIN to protect your documents with a PIN
- For IRS compliance with forms such as an 8879, Fail after 3 PIN attempts must be enabled
- If the form requires both the primary taxpayer and the spouse’s signatures, enable Require Spouse
- To generate a copy of the letter you have sent, enable Download into Document Management
OfficeTools also allows you to send specific documents out for electronic signing without setting them up as a form letter template. To configure the default values for these, refer to the Single Request Default Settings section.
To configure the emails which notify your clients of signature requests and updates, select the Email Settings tab at the top of this screen.
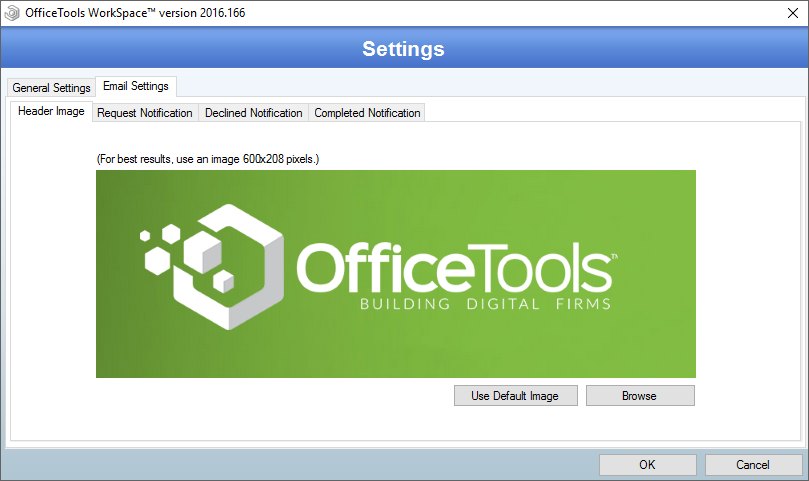
Here, you can select a header image which will be included on each email by clicking the Browse button to find your preferred image. Please note that the image should be 600 x 208 pixels for best results.
There are three potential notifications which your clients will receive: a Request Notification when the request is initially sent, a Declined Notification to confirm that the client did indeed decline, and a Completed Notification when all signers have completed the signing process. To configure the header and body of these emails, click on the corresponding tab and enter your standard verbiage.
After your company defaults have been set up, you can configure your form letters. An example of this could be an 8879. To begin, navigate to the Documents tab and click on the esignatures button to select the Manage form letter templates option.
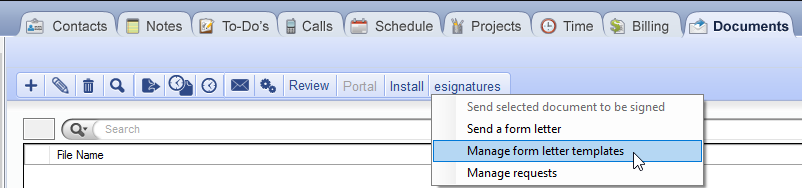
From here, you will be able to add and manage any existing templates.

Click the “Plus” button to add a new template. You will be asked to select a file to base the template on. Please note that you must select a PDF.
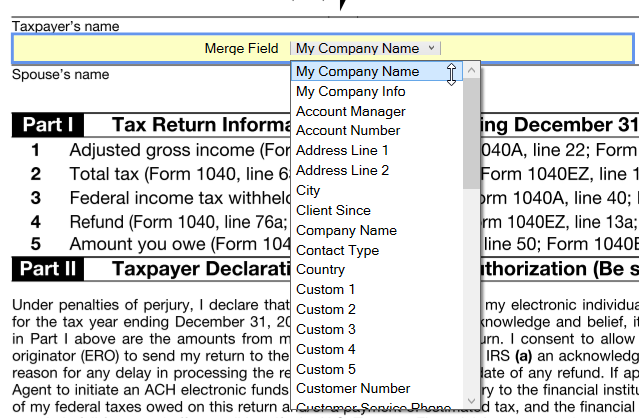
Once you have selected the file, you can begin adding merge fields and signature fields. To do this, right click in the area you would like to create the field on the document and select New Merge Field or New Sign Field.
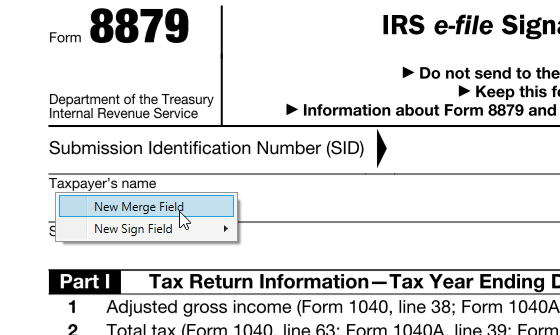
When you have selected the appropriate type of field, ensure that the size of the field is correct by resizing it to fit the line. Move the cursor over the bottom right corner of the field to adjust it. In the case of merge fields, you can also change the information you wish to populate the field with. Select the combo box after Merge Field to change the information.
After all of the required merge and signature fields have been created, you can save the form letter for future use with the “Save” button in the toolbar.