OVERVIEW
This guide will cover the basic options involved in configuring WorkSpace Portal. You will also learn how to set up staff notifications, enable or disable client access to features, link your merchant services, and customize the appearance of your portal.
Use of the Office Tools WorkSpace Portal (Client Portal) requires Office Tools WorkSpace 2015.3xx or newer, a local email client (Outlook), and a modern internet browser: Internet Explorer 9.0+, Google Chrome 16.0+, Mozilla Firefox 5.0+, or Apple Safari 5.0+. Java and Java Script must be enabled and 256 bit encrypted browser settings with SSL 2.0 or 3.0 are required. Local firewalls must allow for use of SSL (https) communication.
USER GUIDE
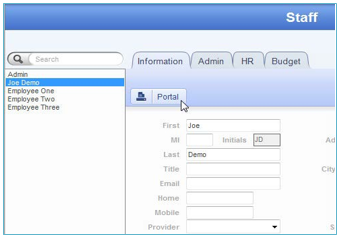
When you have purchased WorkSpace Portal, a welcome email will be sent to the email address on your Office Tools store account. This will be your Portal Admin user account. The welcome email will give you your username, which will be your email address, and a temporary password. Next, you will enter this email address and password in WorkSpace by going to Setup > Staff > Information underneath the Portal button. Select your Portal Admin from the list on the left and click the Portal button.
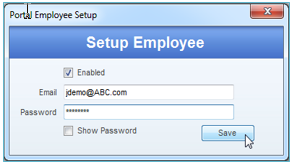
You may now enter the Portal Admin credentials which you set up on the portal. Click the “Enabled” check box, then enter your email and password.
After this, the first order of business is to add the rest of your staff as portal users. To add them, log in to WorkSpace as the Portal Admin. Then, use the same Portal button underneath the Information tab to assign portal credentials. Because you are adding staff to the portal for the first time, you are also creating their portal login and password. Any subsequent password changes will first need to be made on the portal and then entered in WorkSpace.
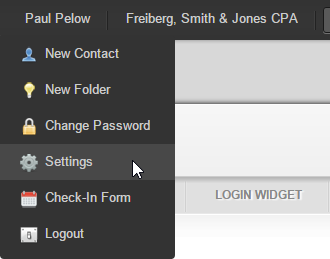
To begin the configuration of your portal page itself, log in to your portal at www.officetoolsportal.com. Then, hover over your staff name at the top of the page and select Settings from the menu below.
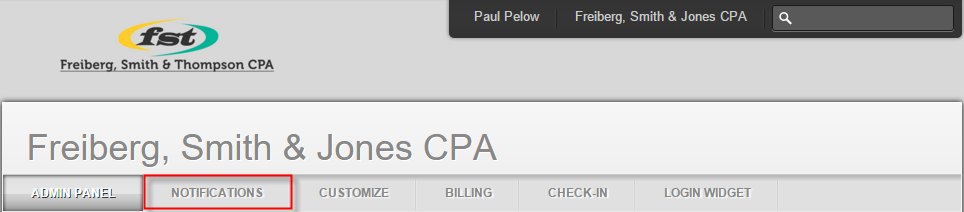
To configure your notifications, select the Notifications section.
Enable Custom Email Templates – Enables customization of portal emails in WorkSpace
Send email notification when client deletes a file – This will notify the staff which the client sent the file to. If a staff member was not selected, the main contact for the company will be notified instead.
Send email notification when client downloads a file – This will notify the staff which uploaded the file
You also have the choice to be notified of any of the following events by email, AIMI, or both. The two most important options to configure are “Selectable Staff for New File Uploads” and “New File Uploads.”
Selectable Staff for New File Uploads – Staff which a client can select to send a file to – The selected staff will receive an email notification.
Client Check-In – Notifies selected staff when a client finishes check-in
Client Information Updated – Notifies selected staff when a client has finished updating their information – The updated information will be available for them to review and approve.
Client Questionnaire Completed – Notifies selected staff when a client has completed their questionnaire – A link to the questionnaire will be emailed to these staff members.
New File Uploads – Notifies selected staff when a file has been uploaded by a client, regardless of which staff member the client selected
Schedule Requests – Notifies selected staff when an appointment has been requested
Schedule Request Confirmed – Notifies selected staff when a Meeting Request has been confirmed by the client
Schedule Request Cancelled – Notifies selected staff when an appointment has been cancelled
Schedule Request Updated – Notifies selected staff when an existing appointment has been updated
Unread Portal Messages – Notifies selected staff if there are unread portal messages
Finally, configure your portal’s appearance and available features by clicking on the Customize tab.
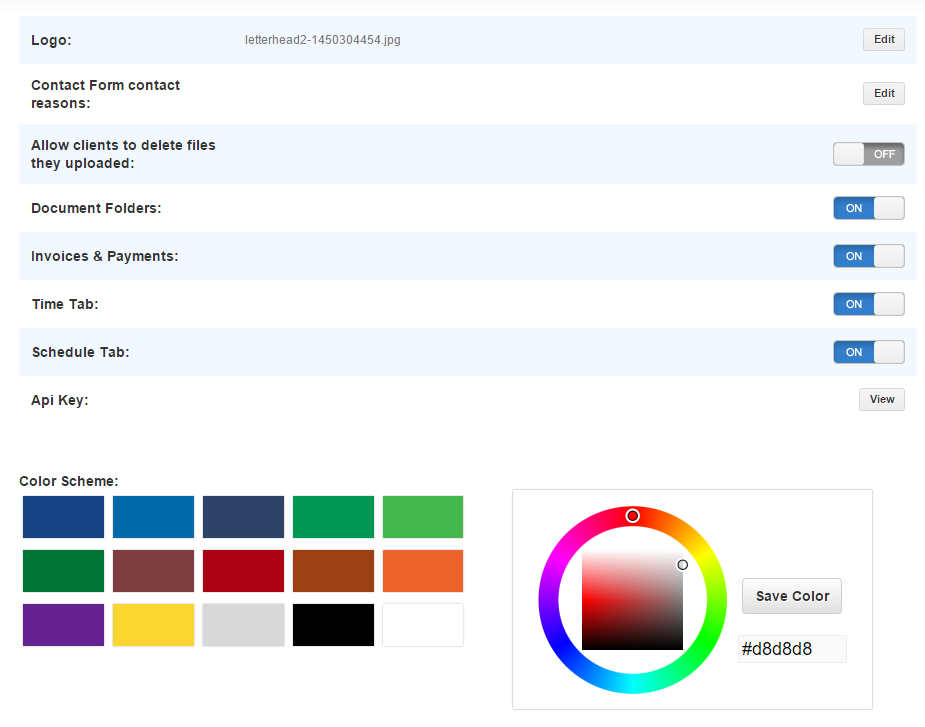
Logo – Upload your firm’s logo as either a JPG, PNG, or GIF with a maximum size of 330 pixels wide by 100 pixels high.
Allow clients to delete files they uploaded – This will only allow clients to delete their files if they were the ones who uploaded them.
Document Folders – This option will store documents in the same folder structure as your WorkSpace Document Management. Your clients will also be able to upload files to these folders. Turning this option off will disable folders on the portal and remove the Folders tab.
Invoices & Payments – This option will allow you to upload invoices from WorkSpace. If you have entered billing credentials, your clients will also be able to pay for their invoice on the portal. Turning it off will remove the Invoices tab.
Time Tab – This option will allow your staff to record their time on the portal. Turning it off will remove the Time tab.
Schedule Tab – This option will allow your clients to request appointments with your firm. Turning it off will remove the Schedule tab.
API Key – This key should already be entered in your portal integration settings in WorkSpace.
Color Scheme – Select the background color you want for your portal page.
If you would like to have a login field for the portal available on your website, copy the code from the Login Widget tab and send it to your website developer.
RELATED GUIDES
- WorkSpace Online client data usage
- WorkSpace Online Reminders
- WorkSpace Online Time Tracking
- WorkSpace Online Scheduling Options
- WorkSpace Online Kiosk Options
- WorkSpace Online General Usage Guide
- WorkSpace Online Settings
- WorkSpace Online Appointment Requests
- Portal Document Transfer
- WorkSpace Online Billing
FREQUENTLY ASKED QUESTIONS
- Why is the Portal saying “This Feature is Coming Soon”?
- Can I send more than one document at a time on the Portal?
- Can I send a tax return to my client from WorkSpace?
- Issues with connecting to the Portal
- Why is WorkSpace crashing when downloading a document form the Portal?
- How can I integrate the Portal with my website?
- Can I run a report to see all the email addresses currently synced to the Portal?
- Can I run a report to see how many clients are synced to the Portal?
- Is there a way to copy the notes from a document that my client uploaded?
- Is there a way to see how large the files are that are uploaded to the Portal?
- Why can’t I download a file from the Portal into WorkSpace?
- Why is the Portal button grayed out within WorkSpace?
- Can I use Outlook to edit the email reminders that get generated form the Portal?
- Why is WorkSpace saying that I am not licensed for the Portal?
- Why are my staff receiving the message “Unable to validate client portal subscription” when trying to upload a file to the portal?